What is focus stacking?
Have you ever looked at those amazing macro photos of flowers and insects by professional photographers, but when you tried it yourself, your photo was grossly out of focus?
That’s probably because the photos you saw used focus-stacking.
Focus-stacking is a technique photographers use when they can’t get all of their subject in focus in a single shot. And it’s a technique that I use almost all the time for my artefact photography.
But, what do I mean by getting all your focus in one shot?
I think everyone’s familiar with the idea of focus being about getting a sharp, not blurry, image.
However, various factors can affect how much of your photo is sharp.
This ‘amount’ of sharpness is called ‘depth-of-field’, and it’s usually referred to as being either shallow or deep:
- Shallow depth-of-field: not very much of the photo’s in focus. Think of portraits of people, where their face is in focus, but the background is pleasantly blurry.
- Deep depth-of-field: all (or most) of the photo’s in focus. Think of landscape photos, where everything from that big rock in the foreground to the hills on the horizon are sharp.
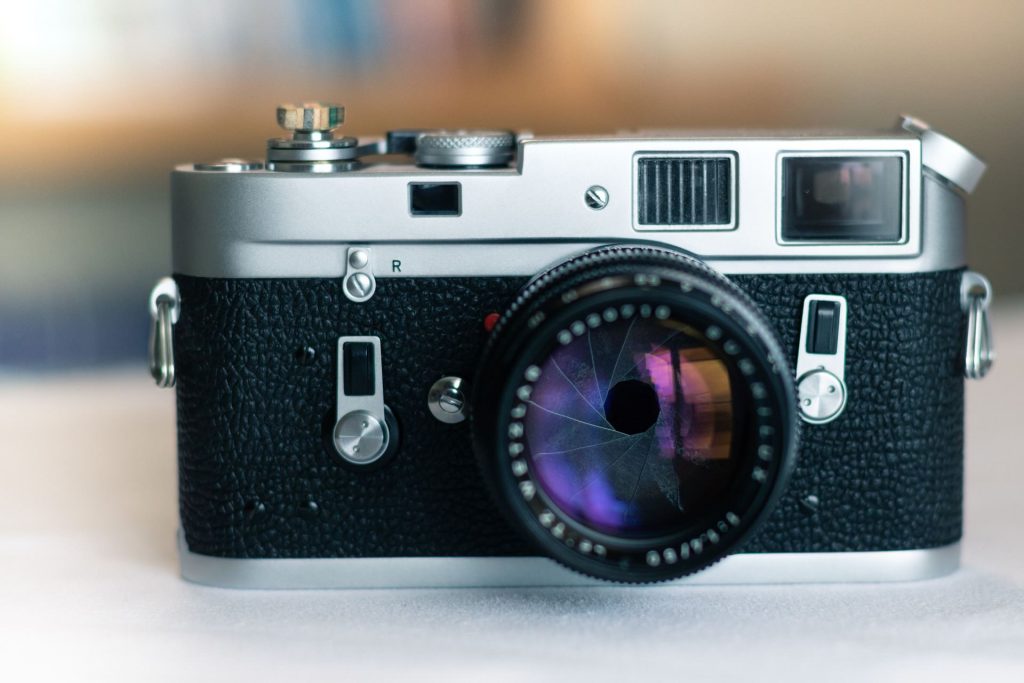
To a certain extent, photographers can control this depth of field using the aperture (f/stop) in your lens. The aperture is a diaphragm made from a set of circular blades that creates an opening in your lens, which can be made wider or narrower, much like the iris and pupil of your eye. Narrow apertures create a deeper depth-of-field than apertures that are wide open.
However, aperture isn’t the only aspect to consider. Another factor which affects your depth-of-field is how close you are to your subject.
When you get really close up to something, your focus falls off again very quickly, which is an issue for macro photography. No matter how narrow your aperture, you’re never going to get focus throughout a photo when your lens is mere centimetres from the object you’re photographing.
So instead, you can use focus stacking to pick up the slack.
To try to put the process in a nutshell, when you focus-stack, you take multiple photos of your subject, moving the focus on the camera a little each time. You then create a composite image on the computer, using the sharpest parts from each photo in the stack.
What’s the process for doing focus stacking?
Focus stacking is quite a carefully controlled process.
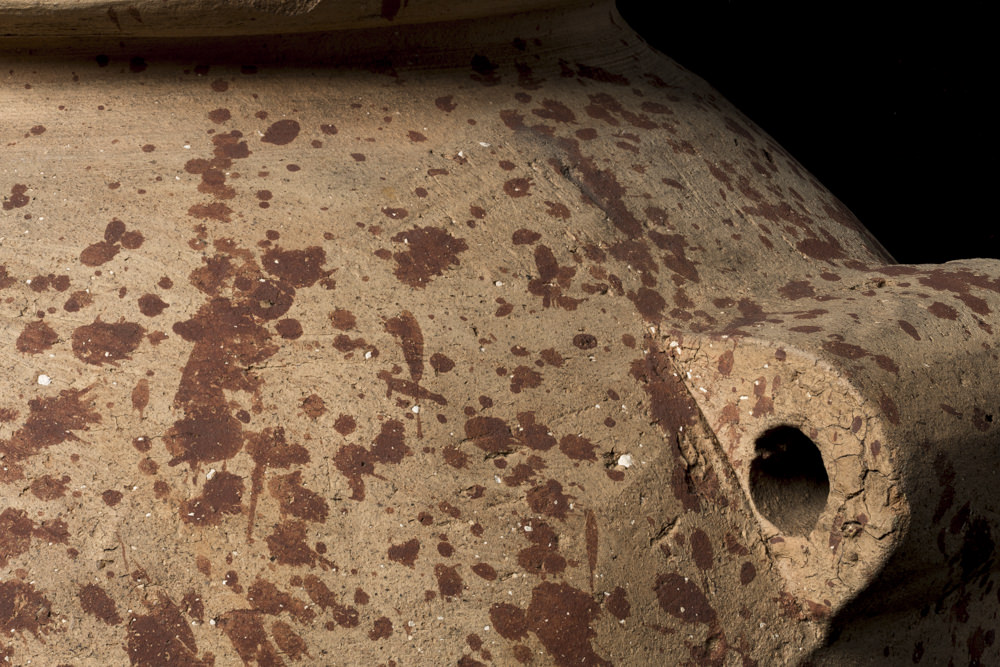
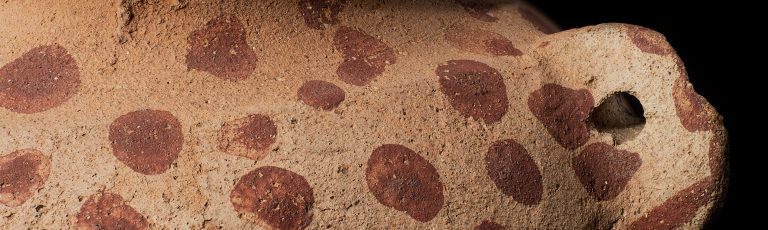
Take, for instance, this Predynastic pot I photographed for the Before Egypt exhibition.
(It’s a marvellous pot; it’s ceramic, but decorated with splats of red paint to mimic the texture of stone. We’ve nicknamed it ‘Splatty Pot’. Naturally …)
Photographing objects for focus stacking
To do focus stacking like this, I have my camera on a tripod and all the settings are done manually. I don’t have anything on auto, to keep everything consistent across the stack of images. The only variant is the focus, which is also done manually. I can’t have the camera making any decisions for me; differences between the photos will make things harder for me later down the line.
I use a setting on my camera’s manual focus called ‘focus-peak highlighting’. This puts little blue highlights on my viewfinder to show me which part of the photo’s in focus. Being able to see exactly which part of the photo’s focussed makes my life a whole load easier.
Not only can I see where the camera’s focussed, I can make my adjustments to the focus very precisely, very quickly.
I then take a series (stack) of photos, moving the focus a little each time, from front to back. Everything else about the photo is identical.
Splatty Pot needed 50 photos in total to get everything in focus.
This is the first image in the stack. You can see that the pot’s in focus at the front (bottom left corner of the image), but it drops off again as you move backwards:

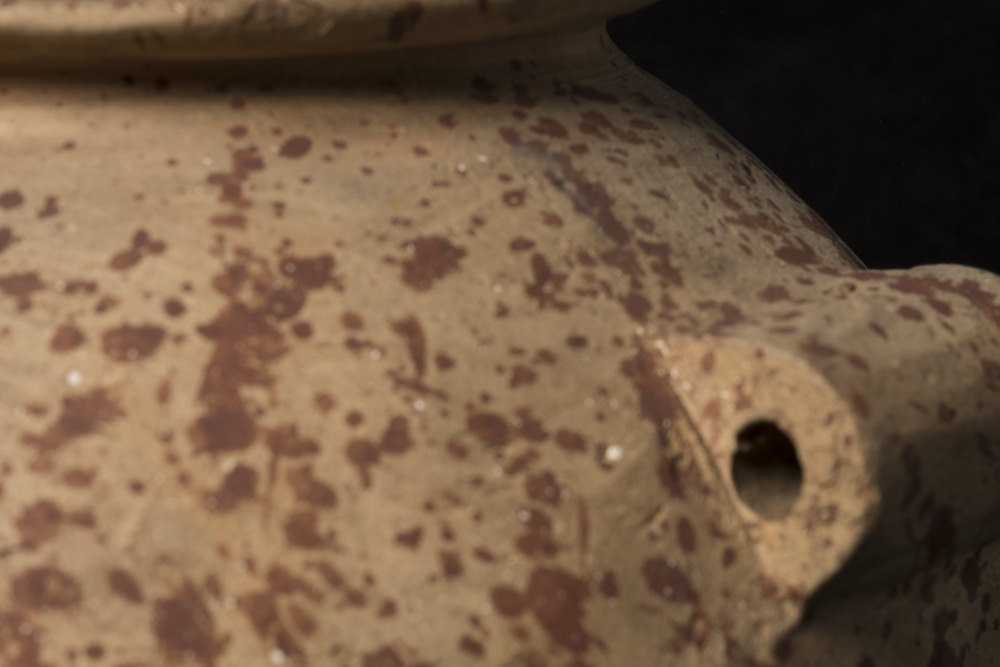
This is the last photo of the stack. Only the very back part of the pot (top right corner of the photo) is in focus:
Creating the composite image
Once the photography’s done, I load the stack of photos into software on my computer.
You can use Photoshop, but it’s clunky and slow and annoying. It’s one of the few things that Photoshop’s not actually very good for.
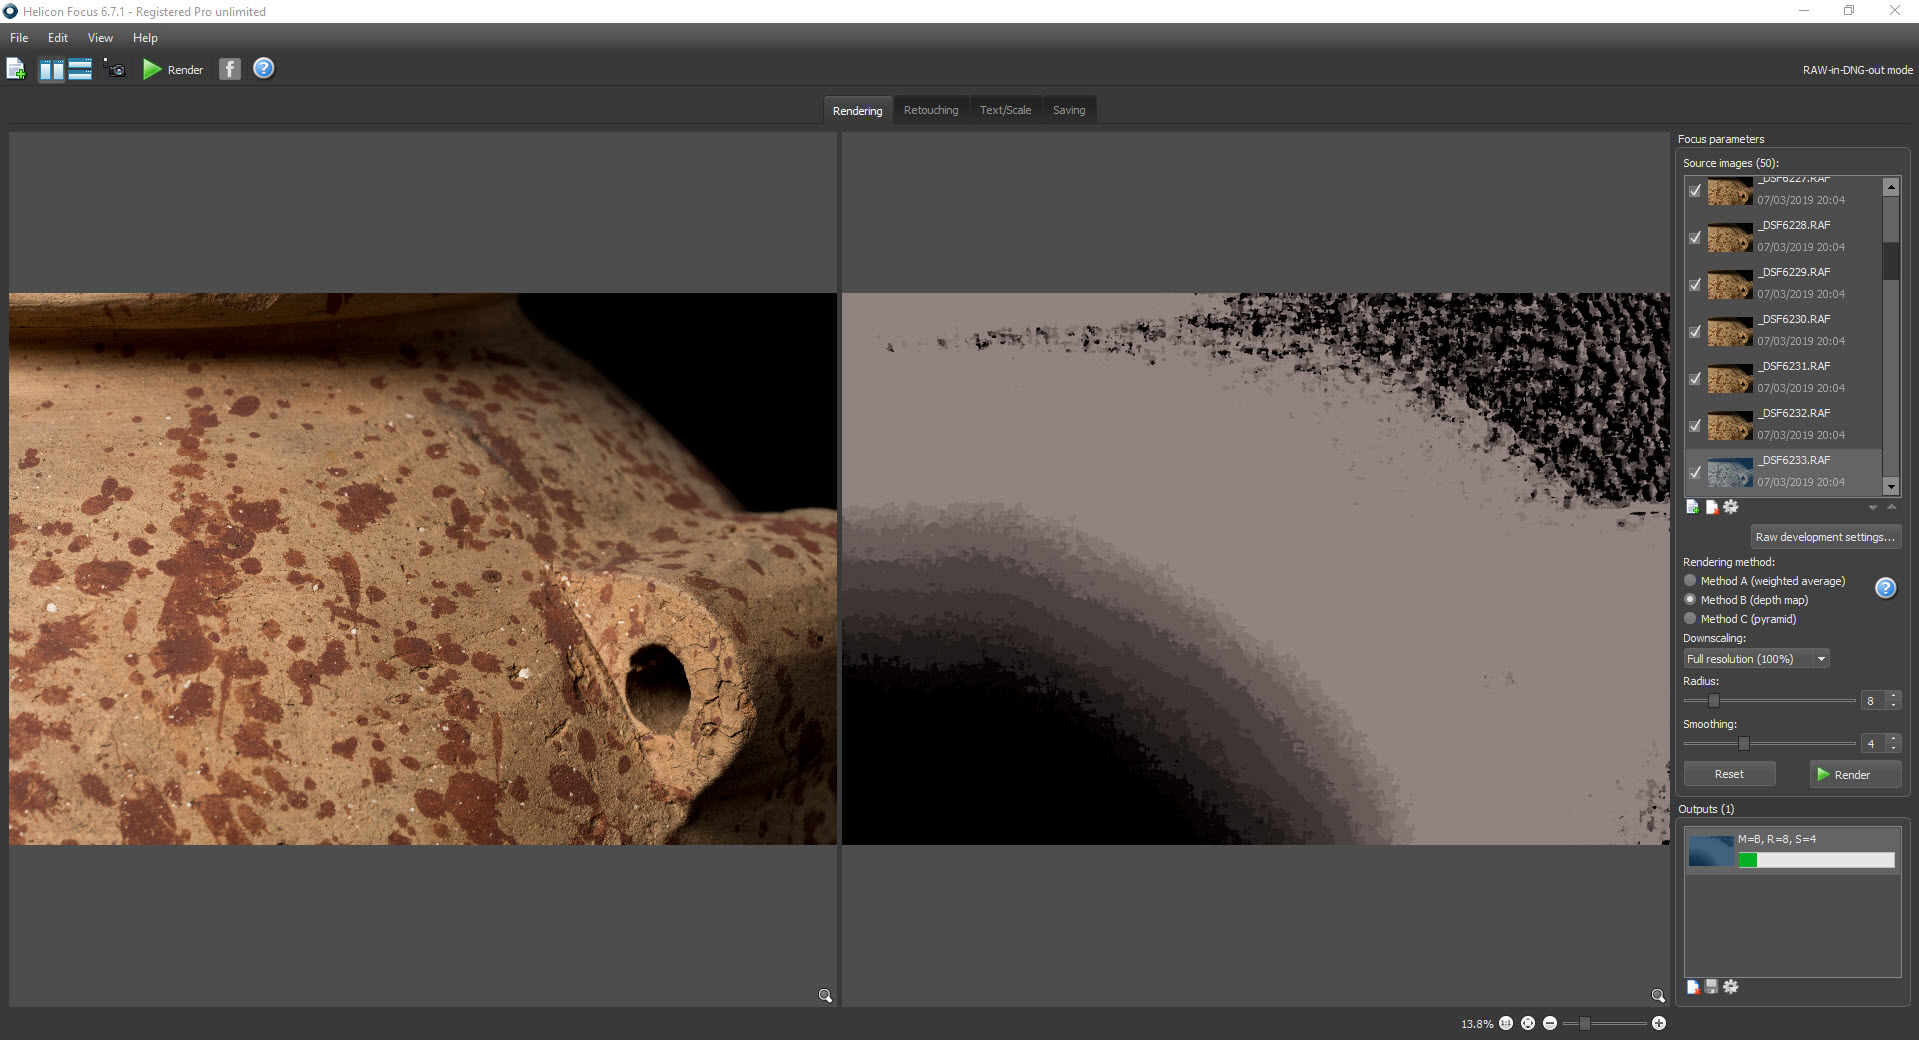
Instead, I use a piece of software called Helicon Focus, who’s main life goal is to focus stack. (It’ll do in ten minutes what Photoshop takes two hours to do.)
Once the stack of images is loaded, Helicon Focus takes the sharpest part of each photo and creates a composite image, which I then save out as a TIFF and edit in Photoshop.
This is the part of the process that needs the consistency across the photos. If the exposure or white balance is different in some of the photos, Helicon Focus will struggle.
It also needs to have the focus moving in one direction from the first to the last photo. If the focus jumps backwards and forwards rather than in a straight line, Helicon Focus will throw a hissy fit, tell me off and go on strike.
Consistency is key!
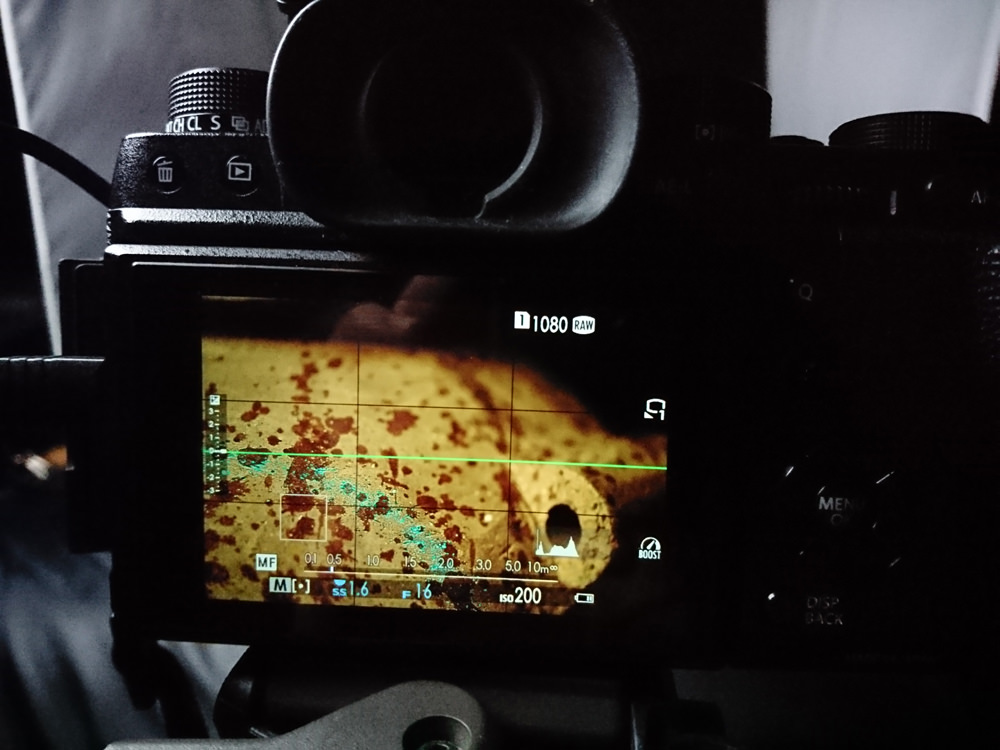
The screenshot below is of Helicon Focus. On the left is the photo currently being processed. To its right, the funny fuzzy part is the composite image being built up.
On the far right of the screen is the stack of photos, as well as the various options for creating the composite image.
And here’s the finished image. Sharp from front to back!
Why do I use focus-stacking?
As I explained above, the closer you are to the object you’re photographing, the shallower your depth-of-field.
So, while you can go out and take a photo of a landscape, getting miles of sky and hills and sea in focus in a single shot, when you get your macro lens right up in the face of a tiny amulet, your depth-of-field lasts mere millimetres.
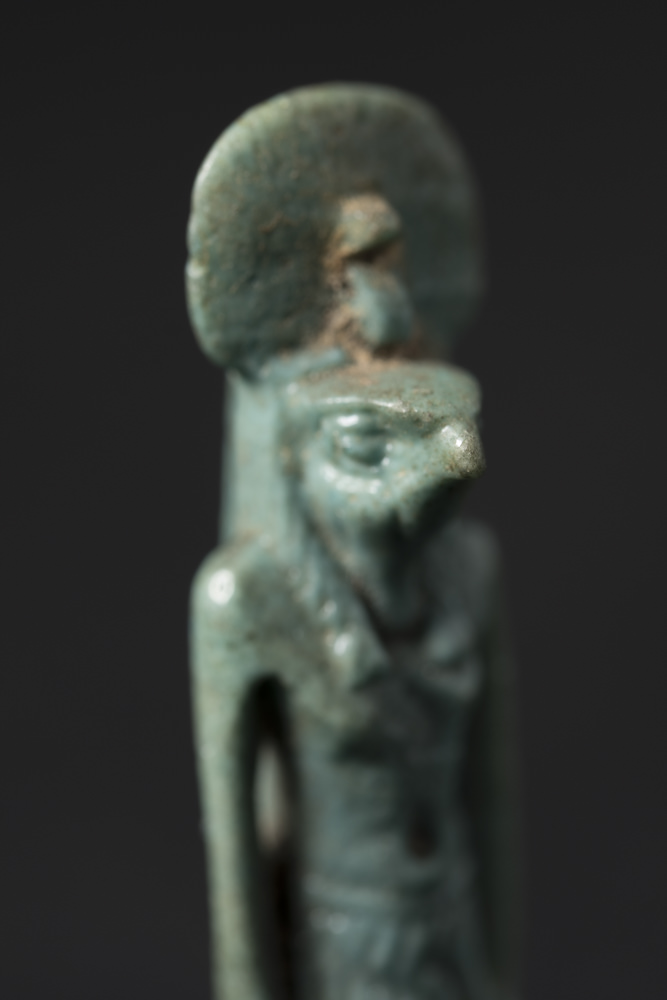
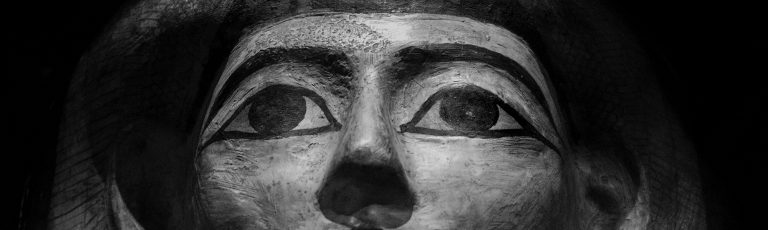
This means that a lot of the time, unless I want a really artsy, selectively focussed image (which I do sometimes), I have no choice but to focus stack. Have a look at this Horus amulet.
This is the first image in the stack of photos I took. You can see that just Horus’s beak is in focus.
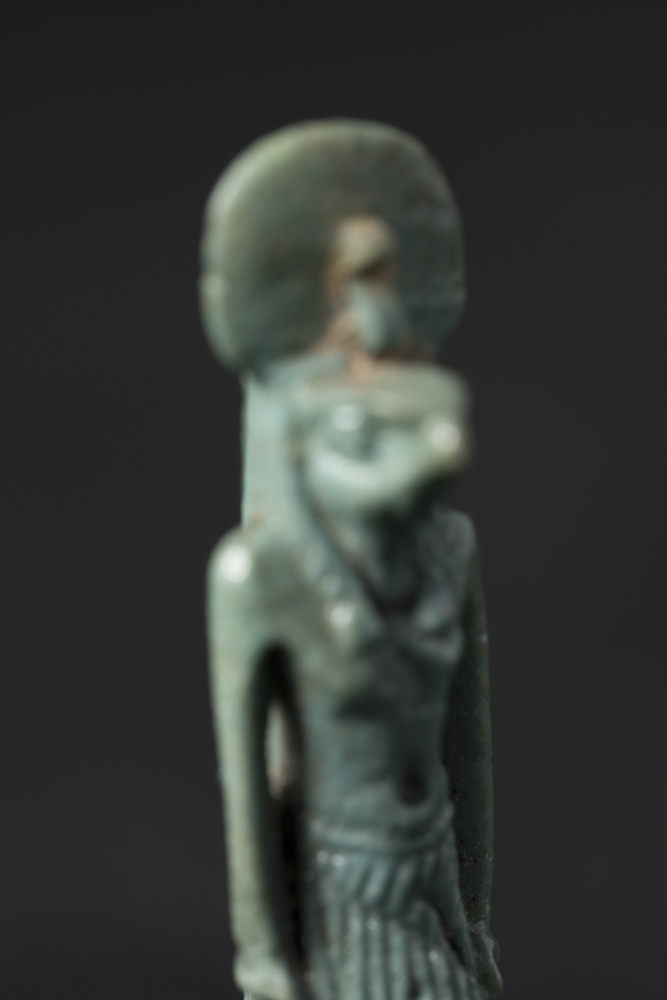
And this image is the last one in the stack. You can see that just his back arm is in focus:
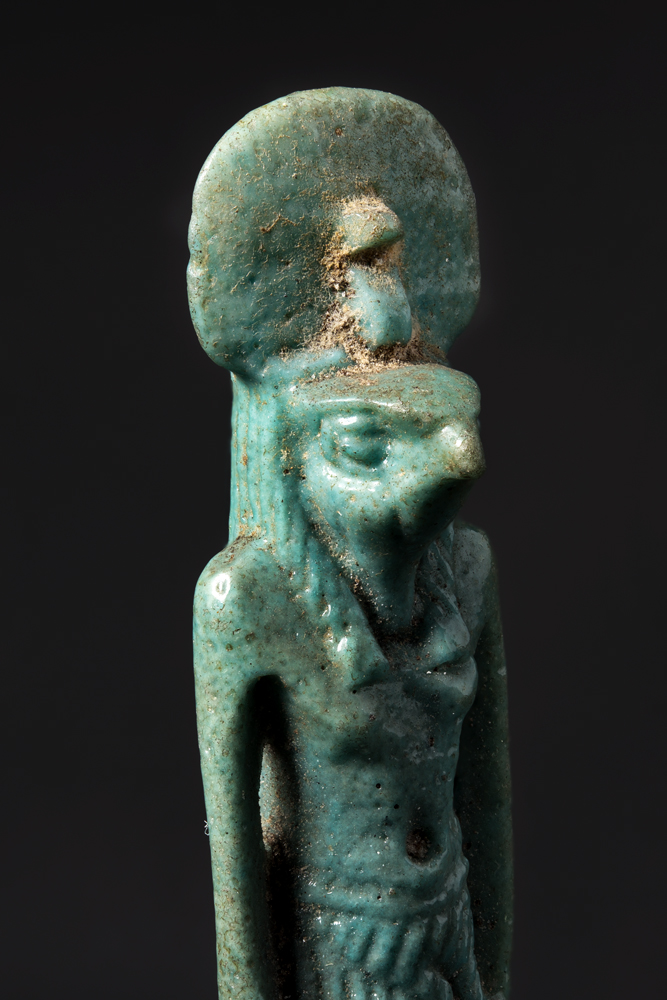
And here’s Horus in all his focus-stacked glory.
(65 images, in case you were wondering.)
The advantages of focus-stacking
I focus-stack most of the photos I take of objects. When I’m showing artefacts – some of them very tiny – I want to capture details in shape, texture and form, so I need to know I’ve got everything I’m going to want to show.
Even the bigger pots that I photograph from further away get stacked. It may be only four or five photos in the stack, but I know I’ve got a really sharp image.
Using Helicon Focus then gives me even more choice. Once I’ve got my stack of photos home, I can create an image that’s sharp all the way through, or I can go back and use fewer photos to create an image with selective focus.
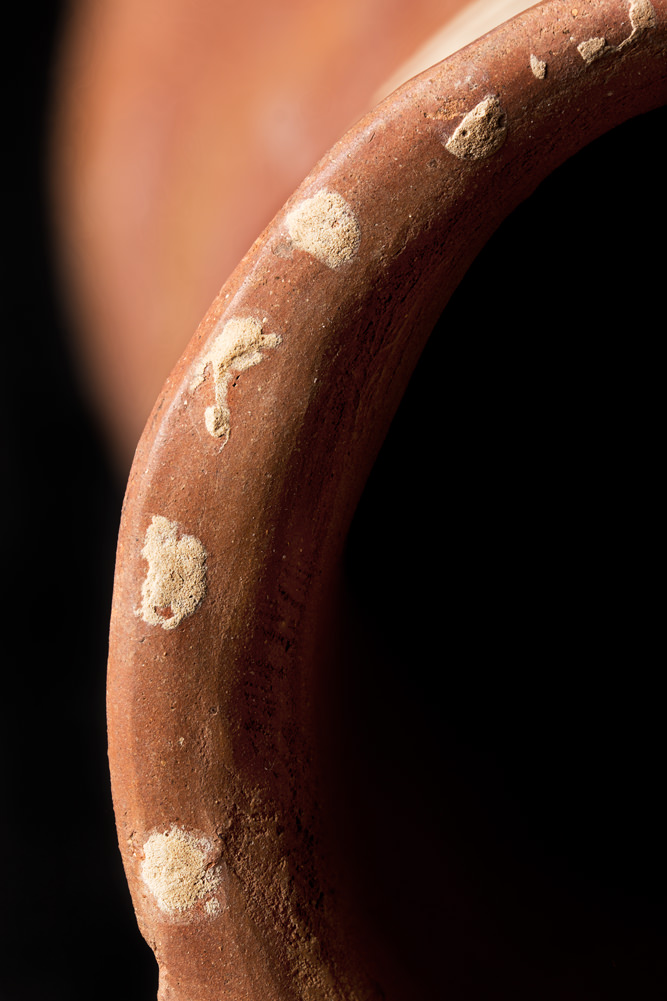
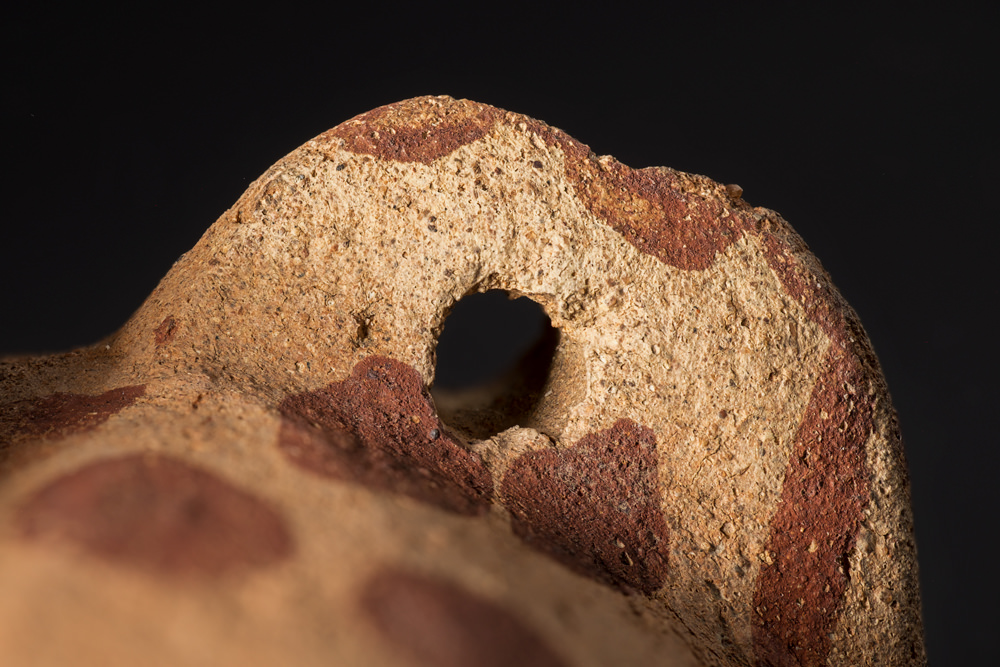
In these two images, for instance, I didn’t want sharp focus throughout. I’ve used more selective focus to draw your eye to the most important part of the photo: the spots on the rim of the red pot (left) and the detail in the lug handle (right):
When I’m under pressure to get objects photographed, and I’ve already had to think about lighting and composition, being able to think about depth-of-field at a later date makes my workflow more efficient.
The disadvantages of focus-stacking
As is the way with life, there are disadvantages to consider with focus-stacking:
- You’re taking more photos, so you need more storage. I might come home from a session with 500 photos instead of twenty or so. This means the number of external hard-drives hooked up to my PC is ever increasing
- You need to know how to use manual settings on your camera – shutter speed, aperture, ISO, white balance and focus
- You need extra software, such as Photoshop or Helicon Focus, to process your images
- You need extra hardware, such as a tripod, to keep your camera in the same position for each photo you take
- It’s tricky to do focus-stacking on the fly, such as in a museum gallery, because you need to keep everything but the focus as near to identical in each photo as you can. And museums generally don’t like it if you start whipping out your tripod and moving other visitors out of your way in the middle of their galleries
- Stacks with a lot of images take longer to photograph. Not vast amounts of time, but if you’re photographing several objects, the process can start eating into your day
But, when all’s said and done, the benefits definitely outweigh the downsides, for sure. For me, it’s an integral part of my workflow, and I certainly couldn’t do the amulet photography without it. The only ongoing expense is the extra hard-drive space I need to store all the photos. But, these days, external drives really are quite affordable.
I hope that’s given you a bit of an insight into how I work. And, for those of you who might want/need to pursue museum photography, it’ll give you an idea of some of the skills you might need in the future.
This wasn’t meant to be a tutorial. It’s just a demonstration of some of the work I do. But, if you have any questions about focus-stacking, or how I do my photography, please do ask in the comments below, drop me a line via my contact page, or email me at julia@tetisheri.co.uk.

Thank you for taking the time to read this article. If you’ve enjoyed it and would like to support me, you can like/comment, share it on your favourite social media channel, or forward it to a friend.
If you’d like to receive future articles directly to your inbox you can sign up using the link below:
If you feel able to support me financially, you can:
- become a patron of my photography by subscribing for £3.50 a month or £35.00 a year
- gift a subscription to a friend or family member
- or you can tip me by buying me a virtual hot chocolate (I’m not a coffee drinker, but load a hot chocolate with cream and marshmallows, and you’ll make me a happy bunny …)
With gratitude and love,
Julia
Unless otherwise credited, all photos in this post are © Julia Thorne. If you’d like to use any of my photos in a lecture, presentation or blog post, please don’t just take them; drop me an email via my contact page. If you share them on social media, please link back to this site or to one of my social media accounts. Thanks!


[…] lens on a compact or bridge would be fine for some of this, I’d struggle with the macro work and the focus-stacking. And the larger sensors and ability to shoot in RAW give me the high-quality images I […]
[…] didn’t need to focus stack the necklace, though I did use exposure bracketing – taking photos at three different […]
[…] is where I had my first real attempt at focus stacking: being this close to an area only a few centimetres wide means focus falls away very quickly, so […]
Hi
I think the original was too large a file and I must have mistakenly thought it had uploaded!
The one attached is a screen shot and probably rather grainy. I’m experimenting to try and get better colour, sharper focus and the light right! Seeing what you have achieved has made me realise there’s a lot more that can be done.
Thanks
Ah, lovely, thanks for sharing that, Peter – you’re well on your way there. I reckon we could get you making some really great photos!
Hi
Really informative and great to read something by someone who has a love of what they do! I’m inspired to research more and find the time to photograph some of the many worked flints I’ve picked up over the years. For me it’s about finding a way of detailing the craftsmanship and beauty of the flint tool (from the simplest scraper to the heavily worked arrowhead). I’m sure to be in contact at some point for some mentoring! The attached image is how things look at the moment but it could be a lot better!
Many thanks
Hi Peter, thanks for your kind words! I’d certainly love to help out. Your photo doesn’t seem to have uploaded, unfortunately. Do you have them uploaded anywhere?
[…] did, however, need to do more focus-stacking with the close-up shots, because focus falls away much more quickly when you’re close to your […]
[…] did some focus-stacking on all the objects, despite their not-very-thickness. This is the case with a lot of macro […]
[…] to them that a sliver of literally a millimetre or two is all that’s in focus, and that’s where I have to use focus stacking, a method whereby you take multiple photos of your subject, adjusting the focus a little each time, […]
[…] in which I talked about both the photography I’d done – including techniques I use such as focus stacking and repairing damaged papyri in Photoshop – and how to handle your camera better in low light […]
[…] and shabtis. The pots I’ve been photographing so far are bigger and much more rotund. There’s a lot of focus stacking to do, and there’s not a shred of papyrus in […]
[…] to your subject, your depth-of-field (how much of the photo’s in focus) is very narrow, so some focus-stacking’s required. The image below is the first photo I took of the stack; you can see the faces are mostly in focus, […]
[…] longer your lens, the shallower your depth of field (how much of the photo’s in focus). This means that focus stacking with the longer lens requires more photos to get the whole thing in focus. To give you exact figures, I needed twenty […]