An Osirian triad amulet
On 19 July 2018, my photography session at the Garstang was a Tiny Egypt one. Feeling a bit like a child at Christmas, I took a box of amulets into the imaging suite and dug in.
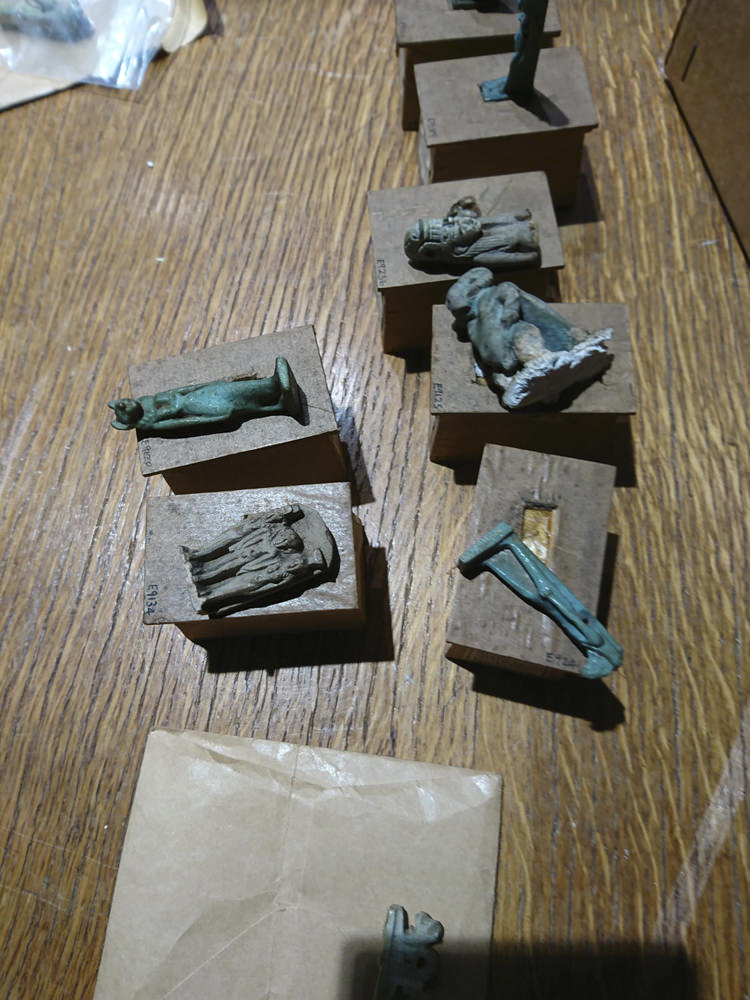
Most of the amulets in the box had suffered the same fate that many have in the collection. Sometime back in the past, these amulets had been glued to faux plinths made of hardboard and brown paper (not something you see being done in museums these days!). However, even more unfortunately, some of these amulets have since been broken off of their plinths again, causing damage to the bottom of the amulet (yes, it makes me hurt a little, too).
As I picked through the amulets, I discovered that most of them had had their accession numbers written on the plinths, and not added to the artefact itself. So, first game of the day was to try to match up the amulets with their plinths.
Some were straight forward because they were the only amulet of that type in the box, and the plinths all had descriptions written on them. However, some — such as the Thoth amulets — were numerous, and I had to physically put the amulets back onto the plinths to see if the base of the amulet matched the hole in the plinth. Yes, really.
I got there eventually, as you can see in the (really crappy — sorry!) mobile-phone photo below.![]()
There were some really interesting pieces in there. Five I photographed that day — one I’m writing about today, the rest I’ll be sharing with you in upcoming posts. There are others I definitely want to come back to photograph in another session.
Today’s subject is a so-called Osirian triad amulet, which you can see lying on its plinth in the photo above.
The Osirian triad amulet

The amulet is only 4.6 cm tall. I’m not sure what it’s made of, exactly, but it looks to be stone of some sort. (If anyone has any ideas, please let me know in the comments below.)
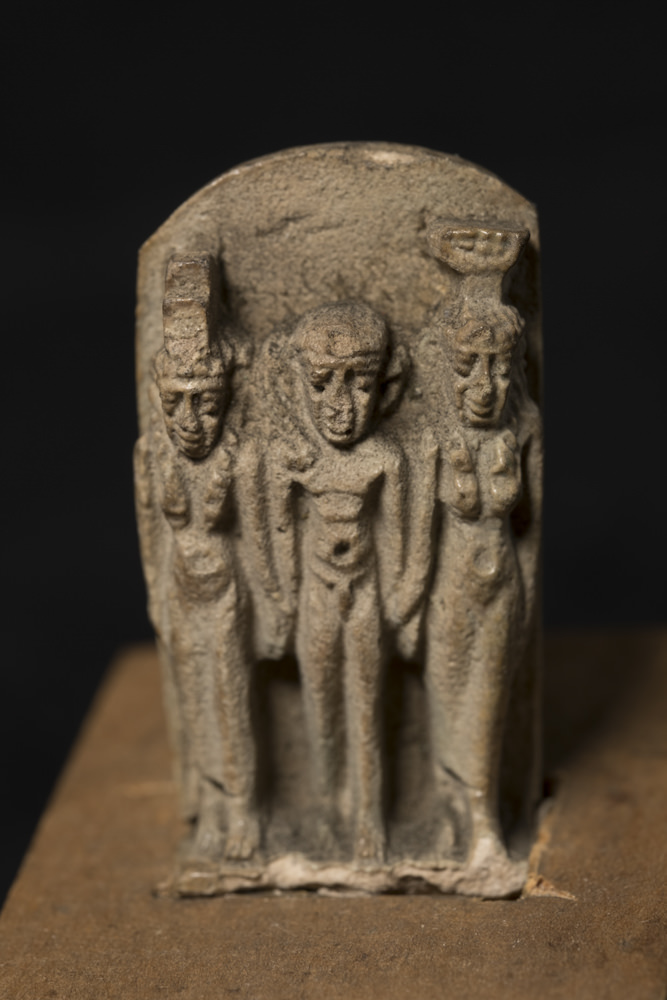
The amulet’s typical of the Osirian triad amulets of the Late Period (despite there not being an Osiris in sight). On the left is Isis, her sister Nephthys on the right. In the centre, holding the hands of his mother and aunt, is Horus-the-Child (‘Horus Pa-Khered’). They’re striding forward in unison. Although they look naked, Isis and Nephthys are wearing (extremely clingy) dresses; you can see the dress-line just above their feet. Here are a couple of parallels I found in the online databases of the World Museum in Liverpool and the Met in New York.
All three deities are easily identifiable: both goddesses have the hieroglyphs used to write their names on their heads — the throne glyph for Isis and the combined basket and enclosure glyphs for Nephthys. Horus is naked and has the sidelock-of-youth hairstyle; undeniable iconography of the god, who rose to prominence in the Late Period as a protective deity.

Photographing the triad amulet
Even though the amulet’s not particularly deep (front-to-back), when you’re this close-up to your subject, your depth-of-field (how much of the photo’s in focus) is very narrow, so some focus-stacking’s required. The image below is the first photo I took of the stack; you can see the faces are mostly in focus, but much of the amulet isn’t. In total, I took twenty-four photos of the amulet, adjusting the focus a little each time to then create a composite on the computer later.
(Of course, sometimes it’s lovely to use selective focus so part of your photo’s nice and sharp while other parts fall into blur. I do do that sometimes, and could do so with this amulet. If I want to, I can choose just one or two of the photos I took that day and process those. I have the choice, and I like that.)
As for the camera angle, I chose to go higher and look down at the amulet a little. I wanted to get the tops of the heads in; in particular, I wanted to get the texture of Nephthys’ hair. I would’ve lost some of that had I shot straight on.
Alternatively, I could’ve gone for a side angle, but I think I would’ve lost too much of either Isis of Nephthys (depending on which side I’d shot it from). I may go back another day and try for a side angle. Perhaps I should …
Processing the image
First job when it comes to processing is the focus stacking. Using Helicon Focus, I load the twenty-four photos in and set it churning. Ten minutes later, I get my composite image out, which I then load into Photoshop to do some aesthetic adjustments.
I’d put the amulet back on its little hardboard plinth because it just wouldn’t have stood up without it. However, the plinth is a) not part of the original amulet and, b) fugly. So, out it comes.
I do this by creating a mask. I select the amulet itself and the mask hides everything outside of that selection. In its place, I put a solid background colour. Some of the masking was straight forward; some was not.
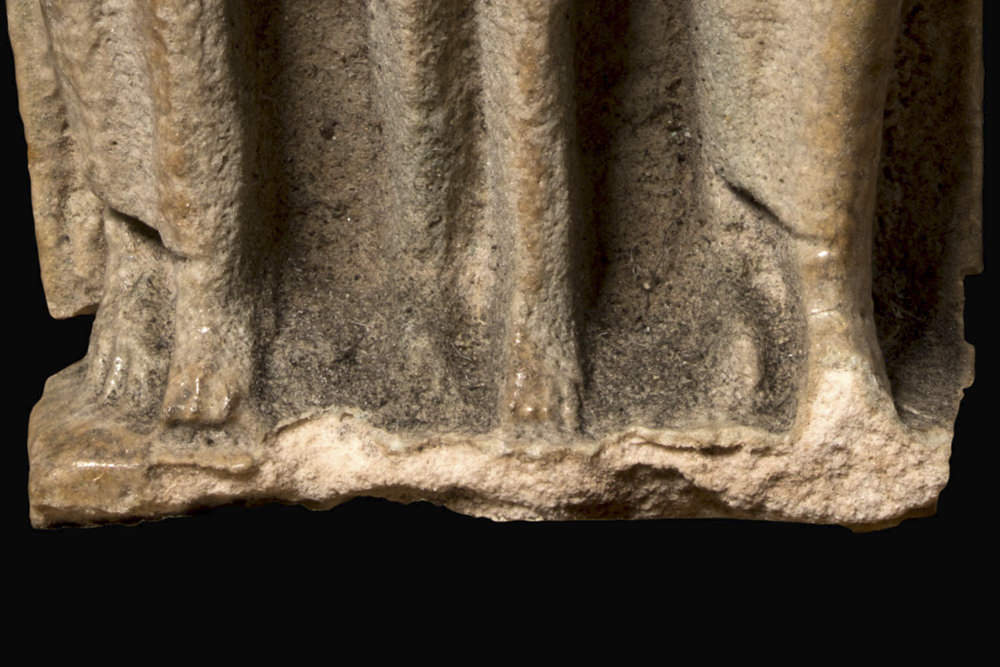
Around the sides and top, the edges are quite clean and straight, so the selection was simple. However, around the bottom, where the amulet’s suffered damage, the edge is not clean at all. It’s a bit crumbly and textured, so I had to spend quite some time with the brush tool refining the edge. (I’m still not entirely happy with this part of the mask. I think I may need to go back and do a little more work on it.)
Once I’ve created the mask, I make adjustments to the amulet itself. I do take a bit of artistic licence sometimes, like when I put an image into black-and-white or make parts drop away into shadow. However, I never add bits in or take parts out (except the crappy, modern plinths!). In particular, I want my images for this project to be useful, as these pieces are so hard to see with the naked eye. They can’t be of any academic use if they’re not faithful to the original.
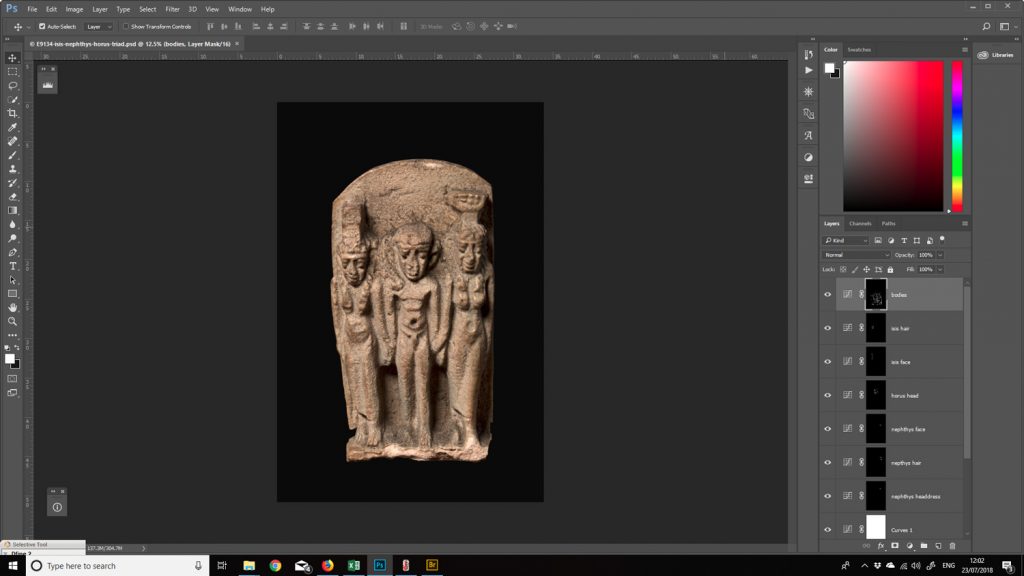
What I do do, however, is make adjustments to the contrast. And this is a really fun part. First, I’ll adjust the contrast for the entire image, but only a little. I then spend time making a whole load of micro adjustments.
In the screenshot below, you can see eight contrast layers (down the right-hand-side, with names such as ‘bodies’, and ‘isis hair’). The bottom layer has a white thumbnail (a representation of the adjustment layer’s mask). This shows that the adjustment on that layer’s been made to the whole image. However, the other seven have black thumbnails with little spots of white here-and-there. Those layers have contrast adjustments made to just tiny parts of the image.
What these micro adjustments allow me to do is make very specific tweaks to the tones to help bring out the texture, such as in the hair, the basket on Nephthys’ head, and even between the toes. I can, very subtly, accentuate the form of the object without actually changing what’s there.
Before and after
We all love a good before-and-after shot (well, I do, at least!). So here’s an unprocessed and the processed images side-by-side for you to compare.


Next time you’re in the museum, seek out the tiny things. Stop and look at them closely, see what you can find.

Thank you for taking the time to read this article. If you’ve enjoyed it and would like to support me, you can like/comment, share it on your favourite social media channel, or forward it to a friend.
If you’d like to receive future articles directly to your inbox you can sign up using the link below:
If you feel able to support me financially, you can:
- become a patron of my photography by subscribing for £3.50 a month or £35.00 a year
- gift a subscription to a friend or family member
- or you can tip me by buying me a virtual hot chocolate (I’m not a coffee drinker, but load a hot chocolate with cream and marshmallows, and you’ll make me a happy bunny …)
With gratitude and love,
Julia
Unless otherwise credited, all photos in this post are © Julia Thorne. If you’d like to use any of my photos in a lecture, presentation or blog post, please don’t just take them; drop me an email via my contact page. If you share them on social media, please link back to this site or to one of my social media accounts. Thanks!


Hi Julia, thanks for demonstrating in your opening paragraphs why object numbers should be on the object, not plinths or loose bits of paper! Great post, great pics. Jan
Hi Jan, thanks for your kind comment! Yes, it really is a bit of a cautionary tale. Thankfully, the plinths all seem to have been kept together with the amulets, so not all is lost. The real travesty, though, is the damage caused to some of the amulets having been snapped off from their plinth (another reason not to do this kind of thing!). Hey ho, museum procedures were not what they are today, I guess… Julia