Repairing papyri in Photoshop
Using Photoshop to repair papyri that have sustained damage is a technique I’ve used for several images featured in the Book of the Dead exhibition.
The environment in which ancient Egyptian funerary texts had lived – sealed away in tombs in the hot, dry climate of Egypt – is what’s allowed them to survive for thousands of years. No mean feat for something made from such an easily degradable and damageable organic material.
Whilst some funerary texts have survived amazingly well, such as the famous Book of the Dead of Ani at the British Museum, others have not fared so well.
For instance, the Egyptians would sometimes fold and roll the sheets of papyrus, which would cause them to crack and break as they dried out over the years.
This is what’s happened to some of the papyri in the Garstang Museum’s collection that I’ve photographed.
Although most of the sheets of papyri are enclosed between two sheets of glass – the best way to protect and preserve them – it was done many years ago, and some of the fragments have since slipped about inside the glass, so the fragments don’t always line up well.
Employing a conservationist to take the papyri out of their glass containers and reassemble them is a costly and time-consuming affair. Using Photoshop to digitally reassemble pieces, however, is much less so (and more fun for me, too).
The Photoshop technique for repairing papyri
So, what is it I’m doing when I’m repairing papyri? The purpose is to pull together and realign broken sections of papyrus. The example I’m using here is from a copy of the Amduat at the Garstang Museum. The Amduat was a funerary text whose contents depicted the nighttime journey of the sun-god through the underworld. This particular copy belonged to the priestess Tjatayundenit, who lived in Thebes in the 21st Dynasty (1077–943 BC).
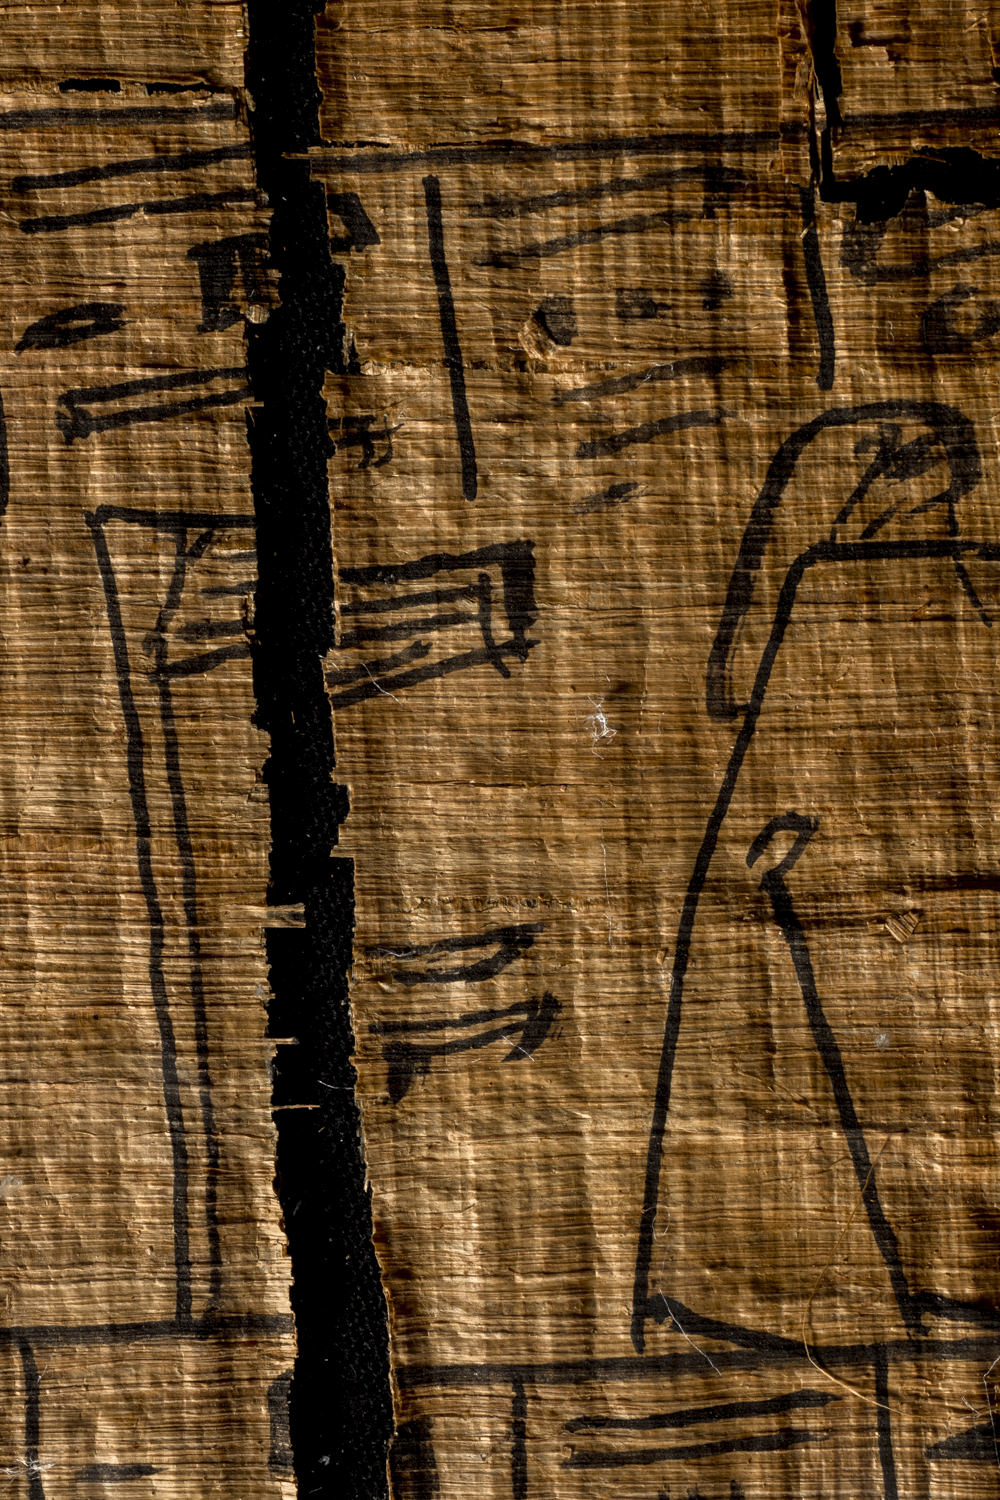
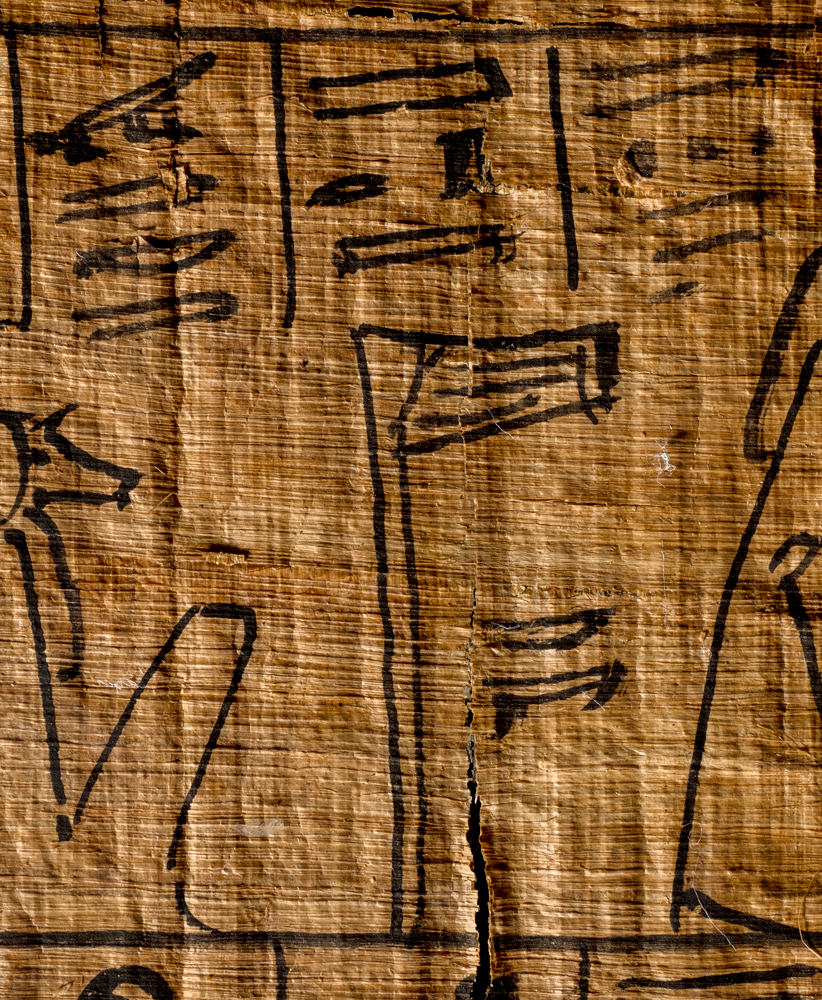
One of the details I’d particularly wanted to pick out was an over-sized netjer-hieroglyph (the Egyptian word for ‘god’). Unfortunately, as you can see from the photo below, there’s a bloody great break running right down the middle.
Using selections and layers
I’d taken two photos of the hieroglyph; one with the glyph a little to the left of the image and the other to the right. This meant that when I pulled it together in Photoshop, I had some extra room to play with.
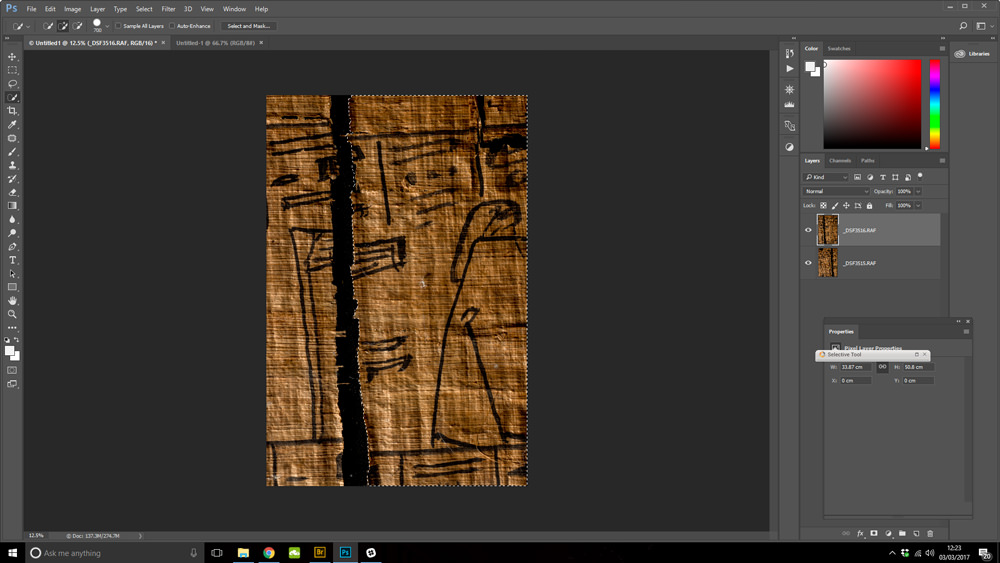
I loaded both photos into one Photoshop document as layers (you can see the layers as two thumbnails at the right of the screen in the screenshot below). Using the Quick Selection tool, I made a rough selection of all the papyrus to the right of the break in the top layer (the white, dashed lines around the right-hand section of papyrus):
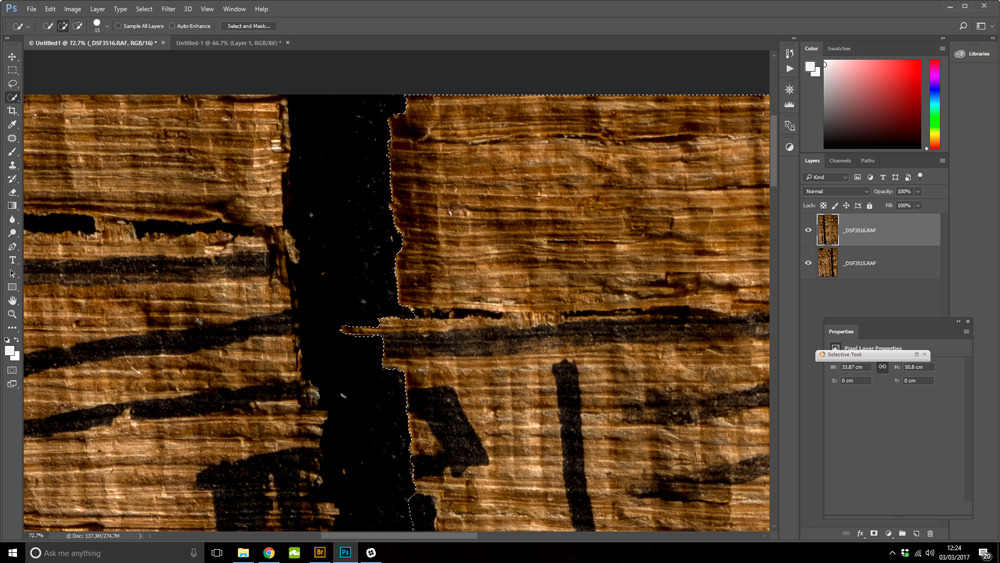
I then zoomed in to refine my selection to make sure I’d included all the little jagged bits along the broken edge:
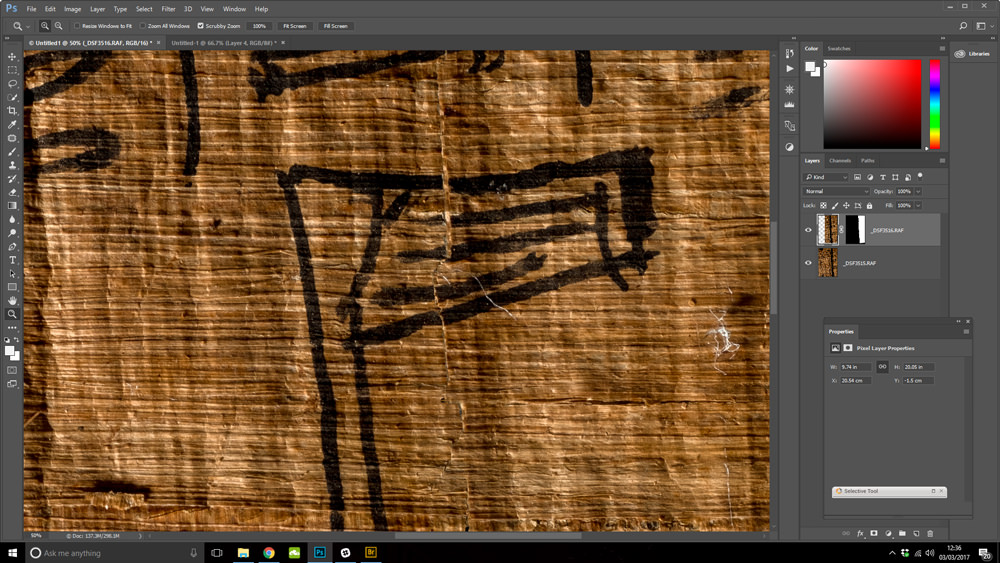
I used the selection to create a mask on the layer. A mask hides everything that’s not included in the selection, making that part of the layer transparent so you can see the layer below it. You can see the mask in the screenshot next to the top thumbnail in black and white; white is visible, black is hidden. What you see in the slightly odd-looking picture below is the left-hand side of the underneath layer showing through the hidden part of the top layer:

Moving the layers around to realign the papyrus
The next stage was to move the top layer around until it lined up with the bottom layer. Unfortunately, both edges of the papyri are a little curled up at the bottom (presumably from where it was folded …?), making it impossible to bring them together completely:

In the close-up below, you can see that the layers aren’t perfect; you can still see the break. I could, if I wanted, use Photoshop to reconstruct the damaged parts: to cover up the break and paint in bits of missing ink. However, this is a step too far for me. It’s one thing to remove empty space, but another to actually add in what wasn’t already there.
Cropping and recomposing the photo
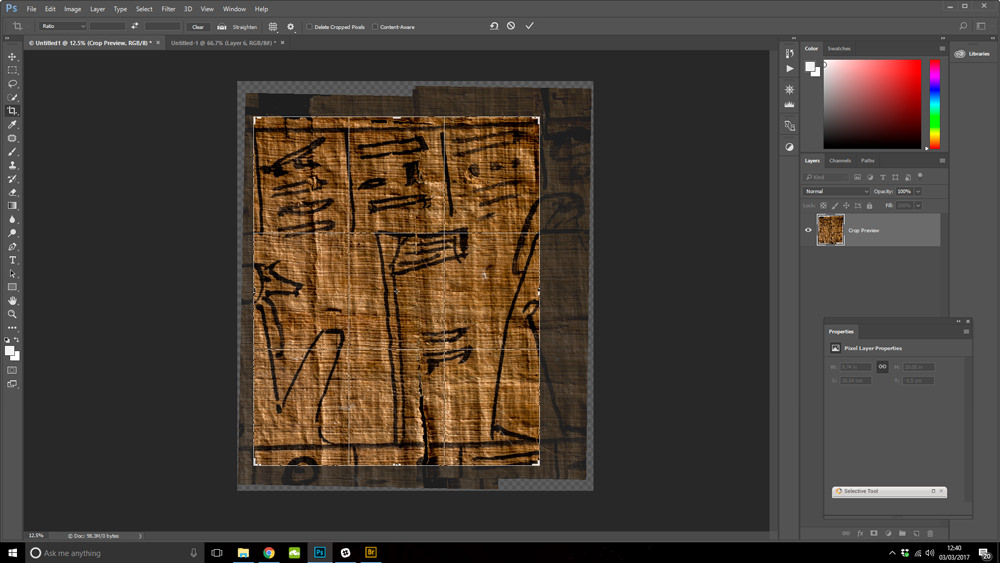
The last step was to straighten and crop the image to get the composition right:
And here’s the finished product. I hope you’ll agree that it makes for a much more comprehensive and aesthetically pleasing image.

Thank you for taking the time to read this article. If you’ve enjoyed it and would like to support me, you can like/comment, share it on your favourite social media channel, or forward it to a friend.
If you’d like to receive future articles directly to your inbox you can sign up using the link below:
If you feel able to support me financially, you can:
- become a patron of my photography by subscribing for £3.50 a month or £35.00 a year
- gift a subscription to a friend or family member
- or you can tip me by buying me a virtual hot chocolate (I’m not a coffee drinker, but load a hot chocolate with cream and marshmallows, and you’ll make me a happy bunny …)
With gratitude and love,
Julia
Unless otherwise credited, all photos in this post are © Julia Thorne. If you’d like to use any of my photos in a lecture, presentation or blog post, please don’t just take them; drop me an email via my contact page. If you share them on social media, please link back to this site or to one of my social media accounts. Thanks!




[…] numerous hours in the photographic suite, many more vying with Photoshop, followed by several weeks of nail biting, hoping my photos would make the grade, finally, we got […]
[…] both the photography I’d done – including techniques I use such as focus stacking and repairing damaged papyri in Photoshop – and how to handle your camera better in low light situations (an expansion of the blog post I […]
[…] then spent many more hours in front of my computer, processing the images. Some of the pieces of papyrus needed a bit of ‘repair’ in Photoshop; the pieces were fragmentary and I pulled them back together to make a more aesthetically pleasing […]